How to install on WordPress
Step 1: Select Appearance Menu
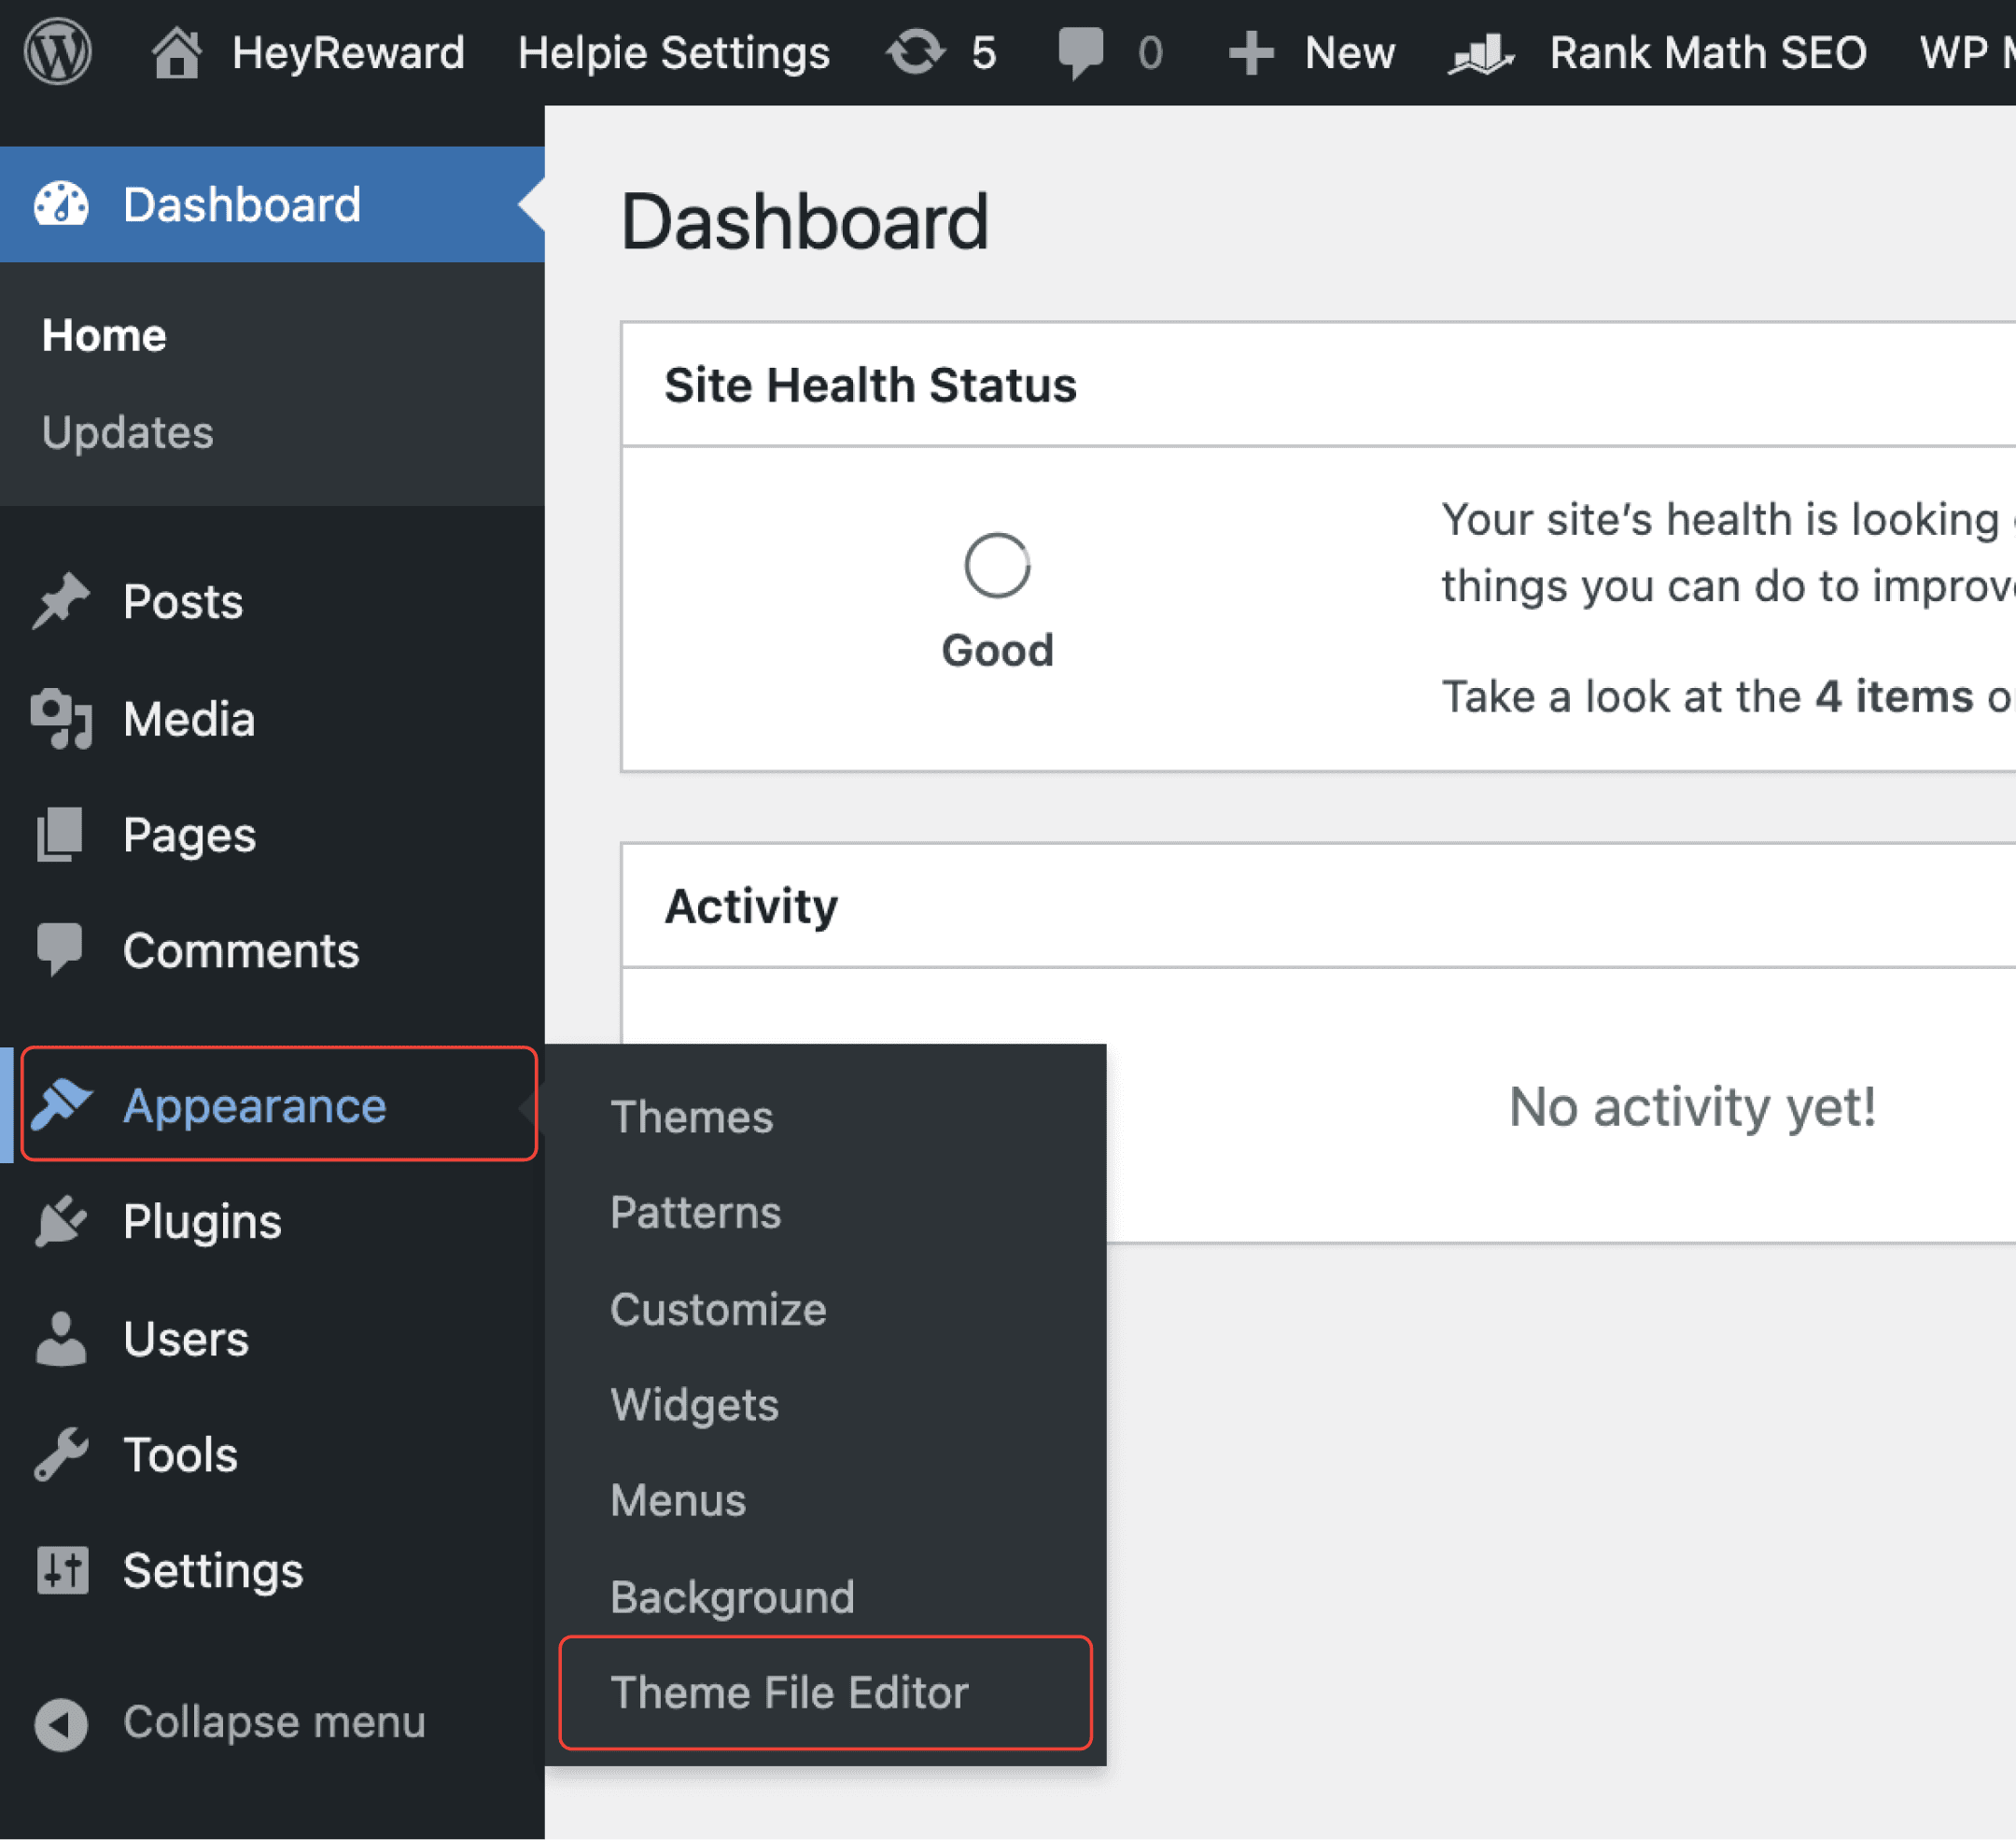
In your WordPress dashboard, navigate to the left-hand menu.
Click on “Appearance” to expand the menu.
Choose “Theme File Editor” from the dropdown options.
Step 2: Locate the Footer File
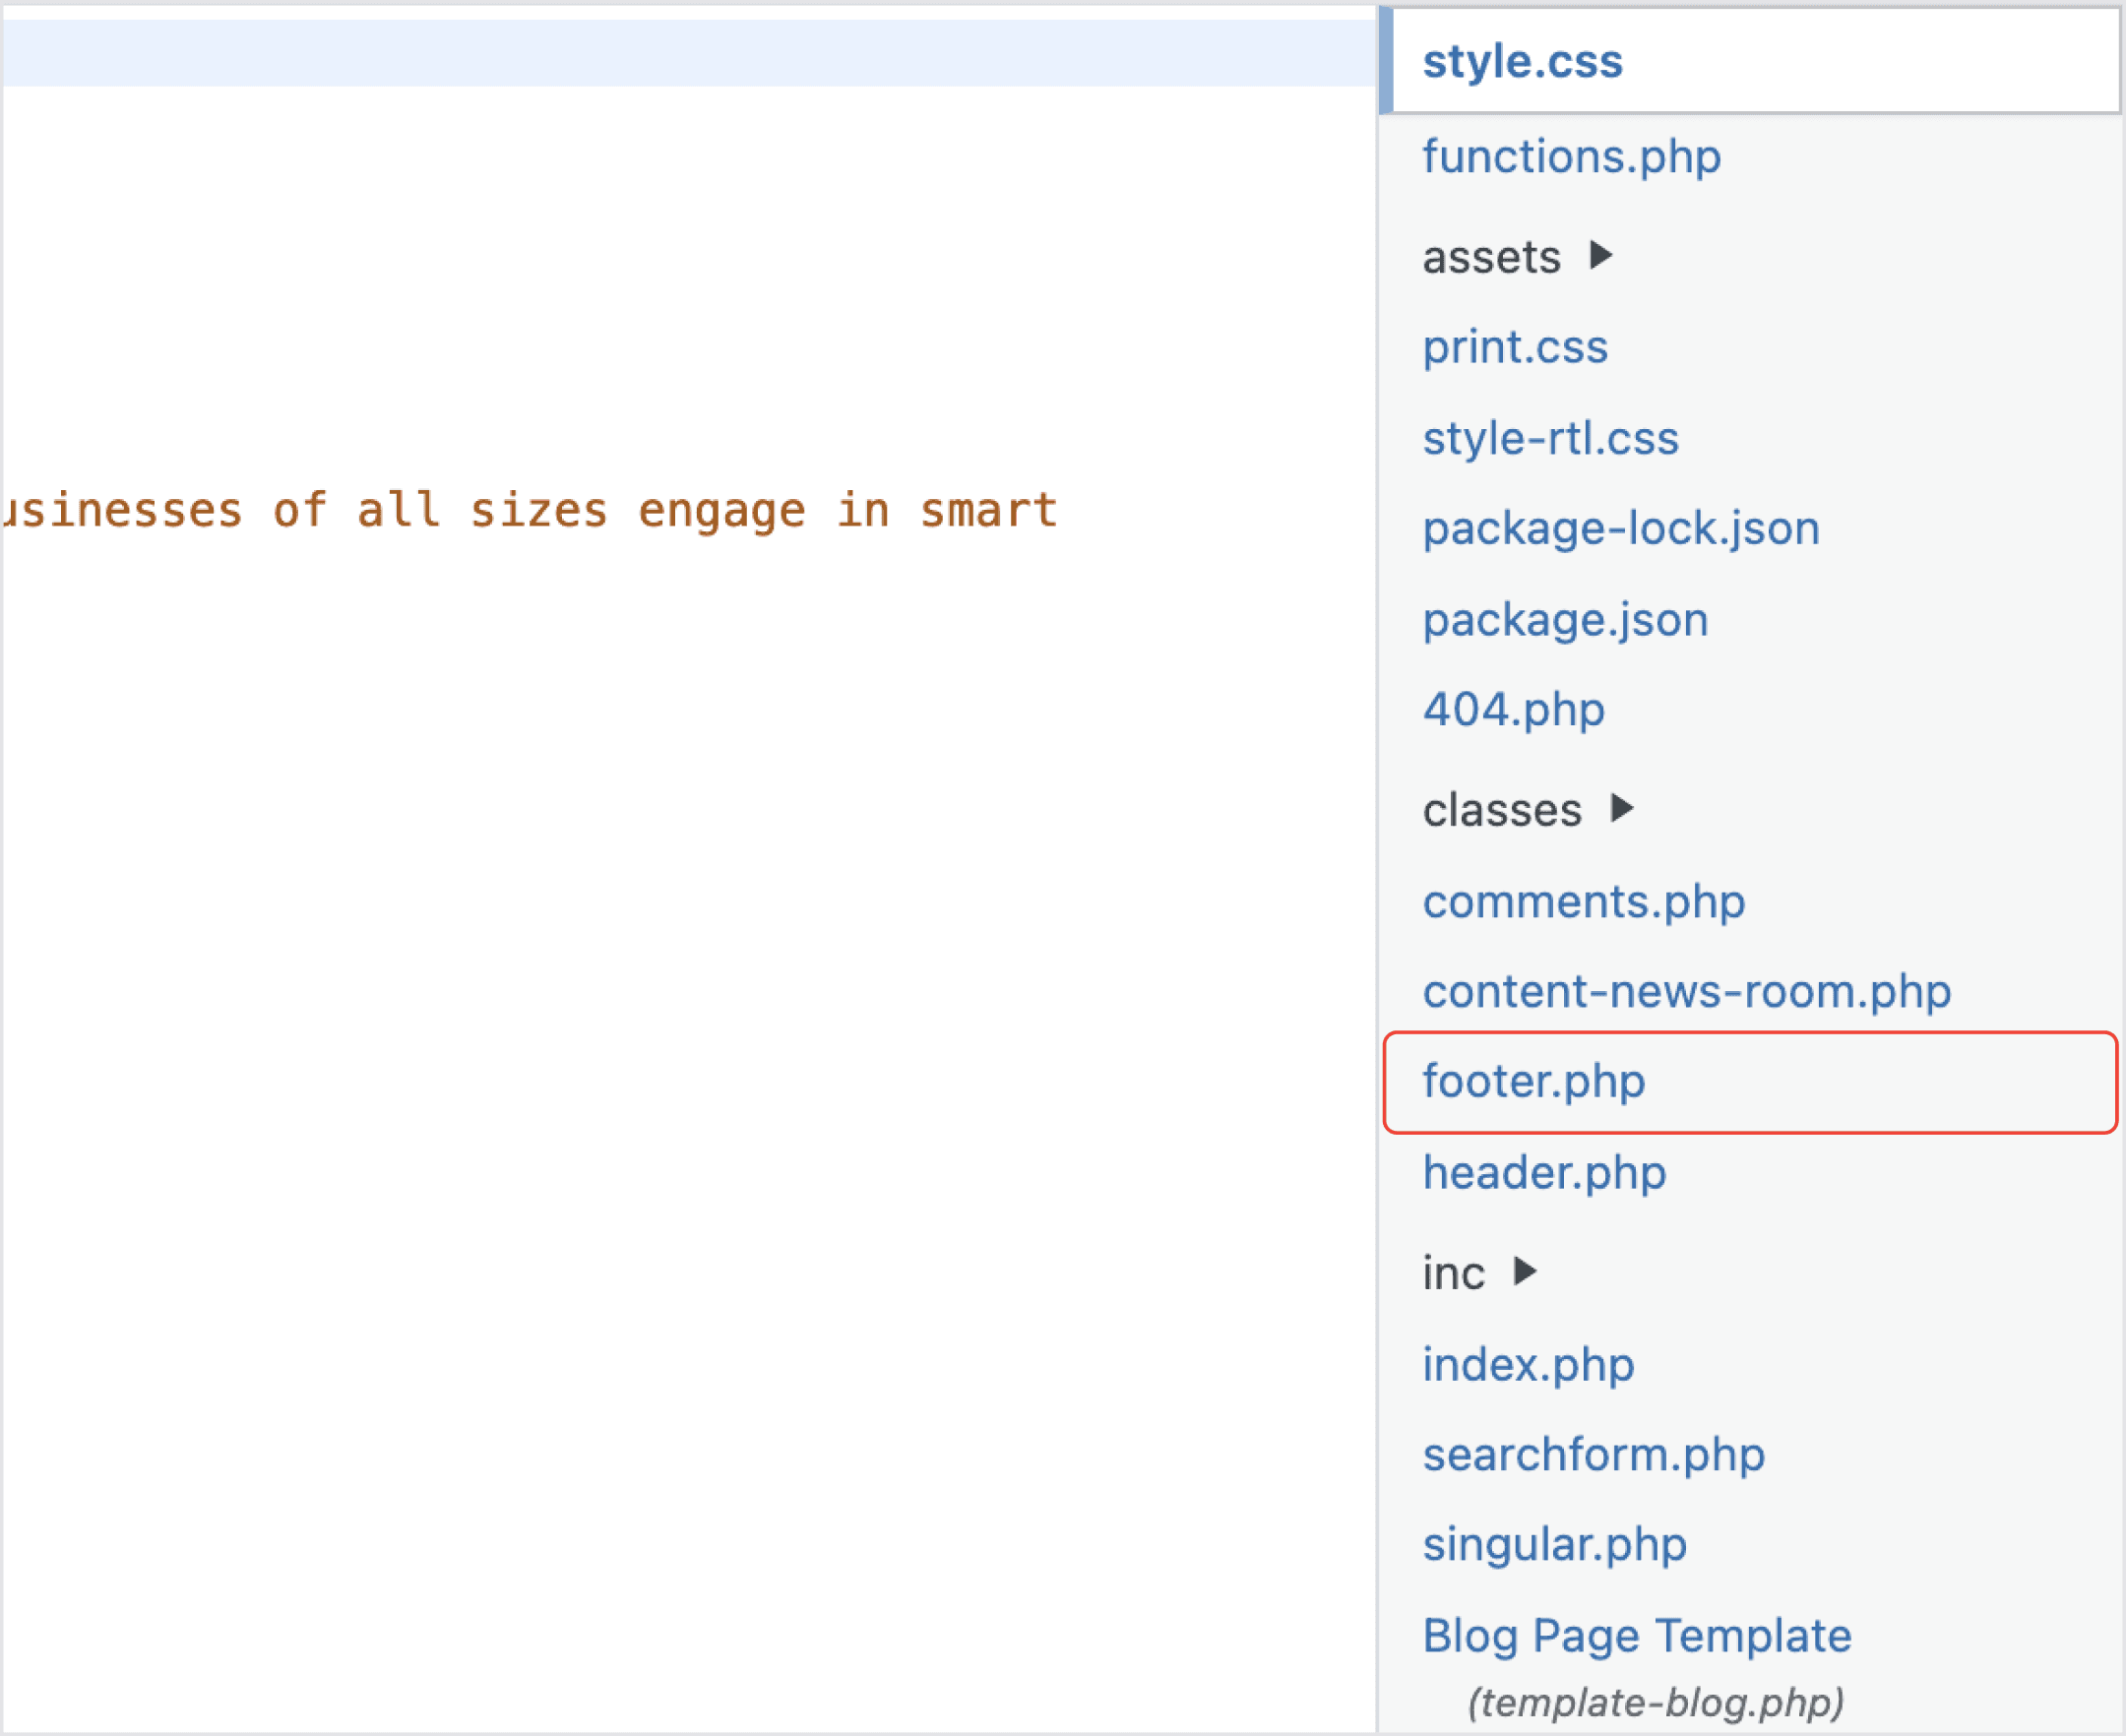
In the Theme File Editor, you will see a file editor in the center and a list of theme files on the right side panel.
Scroll through the file list and select the “footer.php” file.
Step 3: Paste the Script Code and Update the File
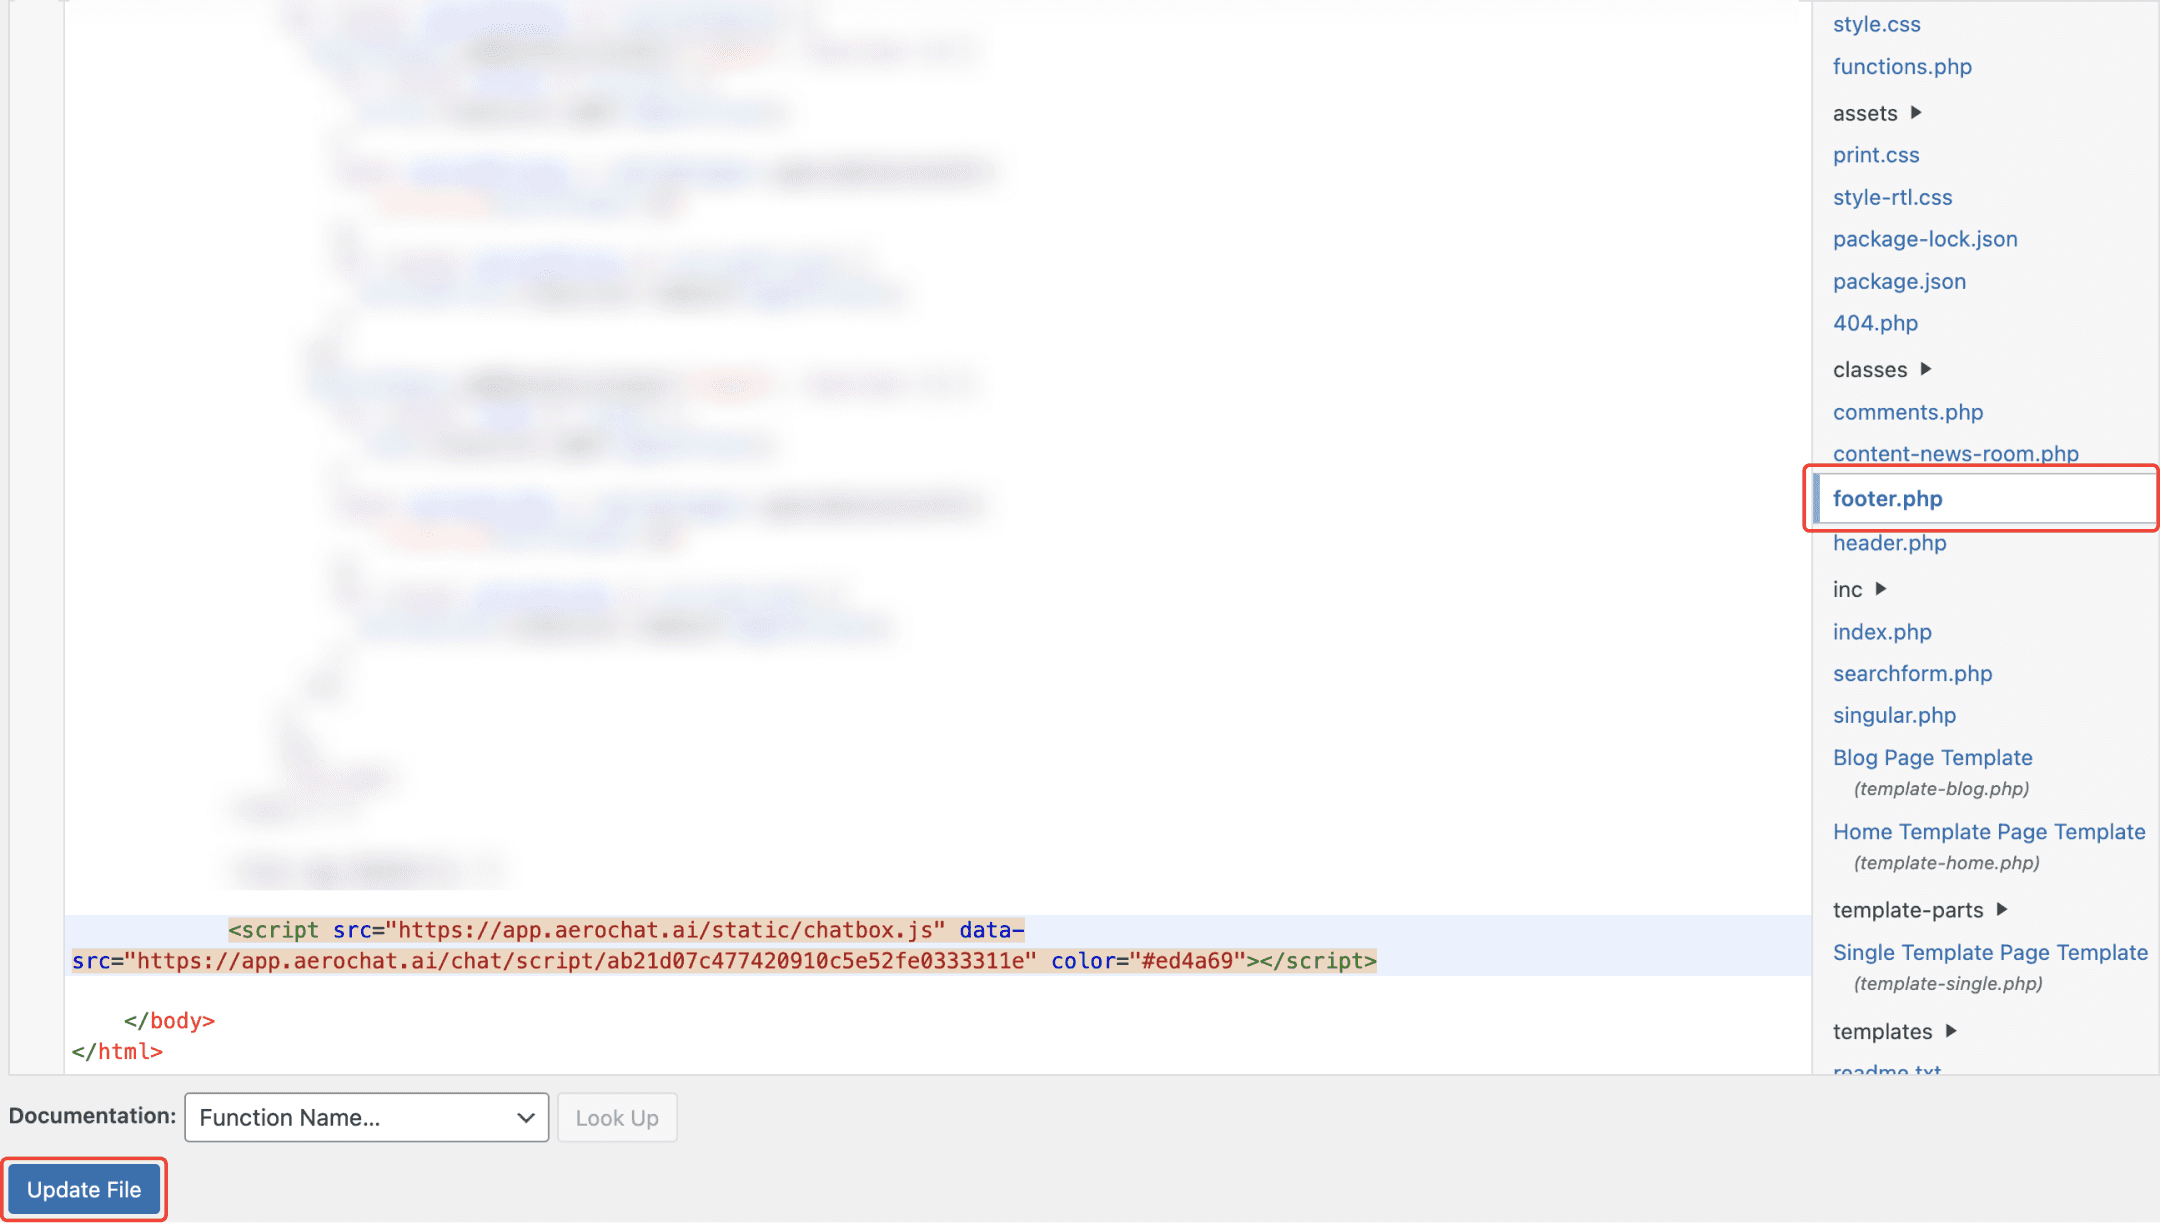
Scroll down to the end of the footer.php file.
Paste your script code just before the closing
</body>tag.After pasting your code, make sure everything looks correct.
Click the “Update File” button to save your changes.
Now, you will see the chatbot widget at the bottom right side of your website.